Tuesday, December 27, 2011

Cutting the T-Box Tenons - Part 1

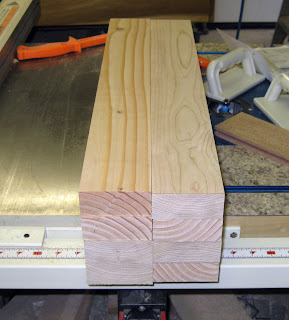
Now that we have some decently lumber on hand... time to mill the tenons!

Cut to length.....

First Cut on the shoulders....

Second and final cut on the shoulders....


The rest of the wood will be removed using the tenon jig. Then I will repeat the process with the smaller square stock.

Prepping the Horizontal Beams for the T-Box Legs

Now that the legs have been assembled, it's time to prep the wood for the horizontal beams....

State of the project....

First Side has been jointed.

Second side has been re-sawed.

Now the first two sides are done... time to repeat for the rest of the wood!

Wood - now with predictable dimensions.

All of the wood for the project - all milled to predicable dimensions.

Now the wood is ready for final milling, including: cutting to length, milling of mortises and tenons, and any needed router-work.

T-Box Legs Aquire Mortises and Glue...

Now the legs have been milled to size... it's time to cut the mortises, and assemble the legs proper...

Mortises have been cut...
The mortises were cut using the mortising machine shown earlier in this blog, which greatly speeds up the process. After the mortises, the rabbits on the opposite sides must be cut. These rabbits are used to increase the strength of the glue joint.

Cutting the rabbits.

Rabbits are done, ready for assembly!

First leg drying.
The other three legs will be assembled over time, next is the milling of the horizontals....

Tuesday, December 20, 2011

A New Project - Improved T-Box Legs.

The next project is a better set of legs for the T-Box in the shop. As the following picture shows, the current arrangement has a number of limitations, include inefficient use of space, and difficulty in moment.

The new set of legs will have a set of locking castors, a mortise and tenon frame, with provisions made for leveling the T-box.
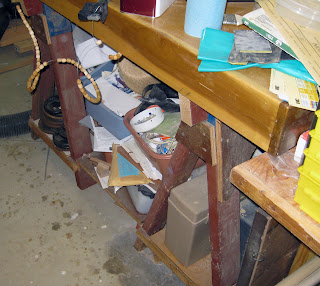
The current T-Box leg set.

First task is to get the legs milled and assembled...

First side jointed....

Jointed and milled to dimension on the first two sides....

Some of the wood that was removed in the re-sawing.

Re-sawing  involves the use of the table saw without a guard over the blade. As a direct result, the use of push sticks is strongly advised. When I was re-sawing the wood for the legs, the push-stick contacted the blade.... and shattered. I felt almost nothing - the blade is very good at cutting!

The re-saw setup.

Shattered push stick.

Wood is at final width and hight...

...and trimmed to final length.

The locations of the mortises are laid out.

Next step is to cut the mortises, and glue the legs together.

Friday, December 16, 2011

...Now With Electronics!

I have intended to have some electronics projects on this blog... I have now finally gotten to it. This first project is intended purely as a practice run for producing PBCs....

This is a device intended as an SMT LED checker... which allows me to check both the functionality and polarity of SMT LEDs. It is ideal to check the LEDs before soldering it in place... they can be difficult to remove.

Before the board was etched... I created the design in Cadsoft Eagle. This resulting pattern was printed out on a sheet of cheap glossy ad paper using a laser printer. The toner patter was then ironed onto the copper using a laminator. The result was then soaked on water to remove the paper, leaving the toner behind. The result is then etched. The toner(resist) is then removed with acetone.


Etched... ready for further work.

All holes drilled, ready for soldering.


All the tools and supplies needed to finish the job.

Crimping the sockets for the header.

Header and battery hold-down soldered in.

(Almost) Ready to use!
All that is needed now, is a limit resistor, and LEDs to check!

Thursday, December 15, 2011

Finishing the Jointer Shelf

Now that the linseed oil is dry,  I can put everything together, and place the shelf in service.


Jointer bolted to the carrying handles.

Note that each bolt has two nuts that are tightened against each other. This allows the bolt be loose enough so the rubber feet will work, but the nuts will not fall off due to vibration from the jointer.

Shelf, ready for use.

Jointer is now stored and out of the way!

That finished up this little project, thus freeing up a little space.

Wednesday, December 14, 2011

Jointer Shelf - A Little Sanding and Finishing

Now that the shelf has had time to dry, I need to sand, and apply finish.

The glue is dry, and the shelf is ready for further work.

Edges have been rounded over, and the sanding is complete.

The shelf is finished with a coat of linseed oil.

The other part of this project involves a set of handles mounted to the jointer. The handles are finished for the most part, all that is needed is the location and drilling of the bolt-holes, and a little sanding and linseed oil.


Hole located...

Countersink for bolt head and washer completed.

Marking the bolt with a Dremel, so it can be cut to the correct length.
Sanded, with a coat of linseed oil.

The only thing that's left is to let the linseed oil dry, and mount the jointer permanently to the handles.

Tuesday, December 13, 2011

A Shop Project: A Shelf for the Jointer

The jointer is an essential machine for the wood shop. It does one thing well: cut a flat surface on a piece of wood. I don't use the jointer all the time, as handy as it is, so a place must be for the storage of the machine.

The solution is to build a shelf into the jig rack. I gain a place to store the jointer when it is not in use and do so without needing additional floor space. As a part of the project, a set of handles will be attached to the jointer for easier handling. If the machine is to be moved for storage, the awkwardness of handling must be reduced!

As of this point, the handles have been fabricated, but the shelf is still a pile of wood....


Still need a little milling.

Shelf sides, read to be attached to the Jig rack...

Shelf sides, waiting for the shelf proper.

Ready for glue!


First Rail drying.

I did not photograph the rest of the gluing process because it was very similar to what is going on in the last picture. In the next post, I will round over the edges, sand and apply lineseed oil finish.

Tuesday, December 6, 2011

The Doors are Finished and Hung.

I didn't keep this blog up for the past little while... but the work did not stop!


While the first door was receiving its finish, the second door was assembled and finish applied:

Second door, ready for assembly...

Clamped, and drying...

Second coat applied.


The cabinet doors are now finished and hung:

Door in use.

Hinge Detail

 Looks good, and keep the dust off the internal supplies...

Thursday, December 1, 2011

First Door Has Been Assembled.

I didn't get photos of the assembly process, because the door went together rapidly. The associated rounding over of the outside edges, and prep sanding took a little longer.

Here is the door right after the glue has dried, but before any further router work or sanding:

Assembled Door - Front Side

Assembled Door - Back Side

The hinge pockets will be cleared out with the same bit that was used to drill the pockets. On a related note, the panel is 3/16" thick, where as the channel it rides in is 1/4". To address this problem, I placed spacers made of card-stock in the groove on the back side of  the door. This pushes the panel flat against the front side of the groove.

A card-stock spacer.

The end result.
Now the first door is ready for finish application. The second door will be assembled soon.